 June 23rd, 2023
How to create a simple Chess Game using Adama Platform
By Mamy Tiana Rakotomalala
June 23rd, 2023
How to create a simple Chess Game using Adama Platform
By Mamy Tiana Rakotomalala
Welcome, guys! In this article, I’ll show you a step-by-step guide on creating an online simple chess game. It will cover the process of structuring the project, creating the frontend, managing data exchange, and implementing move validation and game state with Adama. By the end, we’ll have a functional chess game that you can build upon and customize further. Let’s get started!
Note: In this article, I assume that you have read the Adama book at this link and have familiarized yourself with the Tic-Tac-Toe example provided in the book. Additionally, a basic knowledge of JavaScript and the Canvas API is required.
Chess is one of the more complex board games to program, and there are numerous chess engines built in various programming languages. However, in this article, we will build a chess game using Adama. If you’re wondering why, then take a look at this [link] (https://book.adama-platform.com/adama-as-a.html).
Setting up the project
While the implementation of chess rules can be complex, the structure of our project will be very simple, thanks to Adama! We only need two files: the frontend index.html, which uses HTML5 canvas to display the interactive board, and the backend chess.adama, which is written with Adama and handles the game state and move validation. Additionally, we need an image file called pieces.png that contains pictures of each chess piece to enhance the UI.
Creating the frontend
Let’s start by creating the chessboard using the HTML5 canvas element. Add the following HTML5 script to your index.html file:
<!DOCTYPE html>
<html lang="en">

<head>
	<meta charset="utf-8" />
	<title>Adama - Chess</title>
	<script src="https://aws-us-east-2.adama-platform.com/libadama.js"></script>
</head>

<body>
	<style>
		body {
			font-family: monospace, serif;
			background-image: url("world.png");
			background-color: #cccccc;
		}

		.center {
			display: flex;
			justify-content: center;
			align-items: center;
		}
	</style>
	<div class="center">
		<h2 id="status"></h2>
	</div>
	<div class="center">
		<canvas id="chessboard" width="400" height="500"></canvas>
	</div>
    <script>
    </script>
</body>
</html>
To render the chessboard on the screen, we will use the Canvas API. For the sake of simplicity, we will write the code in pure JavaScript, without any additional frameworks. Inside the <script></script> block of the HTML file, add the following script:
		let BLOCK_SIZE = 50;
		let boardHeight;
		const BLOCK_COLOUR_1 = '#82541e',
			BLOCK_COLOUR_2 = '#d4bc9f',
			SELECT_LINE_WIDTH = 5,
			HIGHLIGHT_COLOUR = '#67adff';
		let ctx = null,
			canvas = null;

		canvas = document.getElementById('chessboard');

		if (canvas.getContext) {
			ctx = canvas.getContext('2d');
			boardHeight = canvas.height - 100;
			BLOCK_SIZE = boardHeight / 8;
			drawBoard();
		} else {
			alert('Canvas not supported!');
		}

		function ROW(x) {
			return (x >> 3);
		}
		function COL(x) {
			return (x & 7);
		}


		function drawBoard() {
			ctx.clearRect(0, 0, canvas.width, canvas.height);
			for (let i = 0; i < 64; i++) {
				ctx.fillStyle = [BLOCK_COLOUR_1, BLOCK_COLOUR_2][(ROW(i) + COL(i)) % 2];
				ctx.fillRect(COL(i) * BLOCK_SIZE, ROW(i) * BLOCK_SIZE, BLOCK_SIZE, BLOCK_SIZE);
			}
			ctx.strokeStyle = "black";
			ctx.strokeRect(0, 0, BLOCK_SIZE * 8, BLOCK_SIZE * 8);
		}
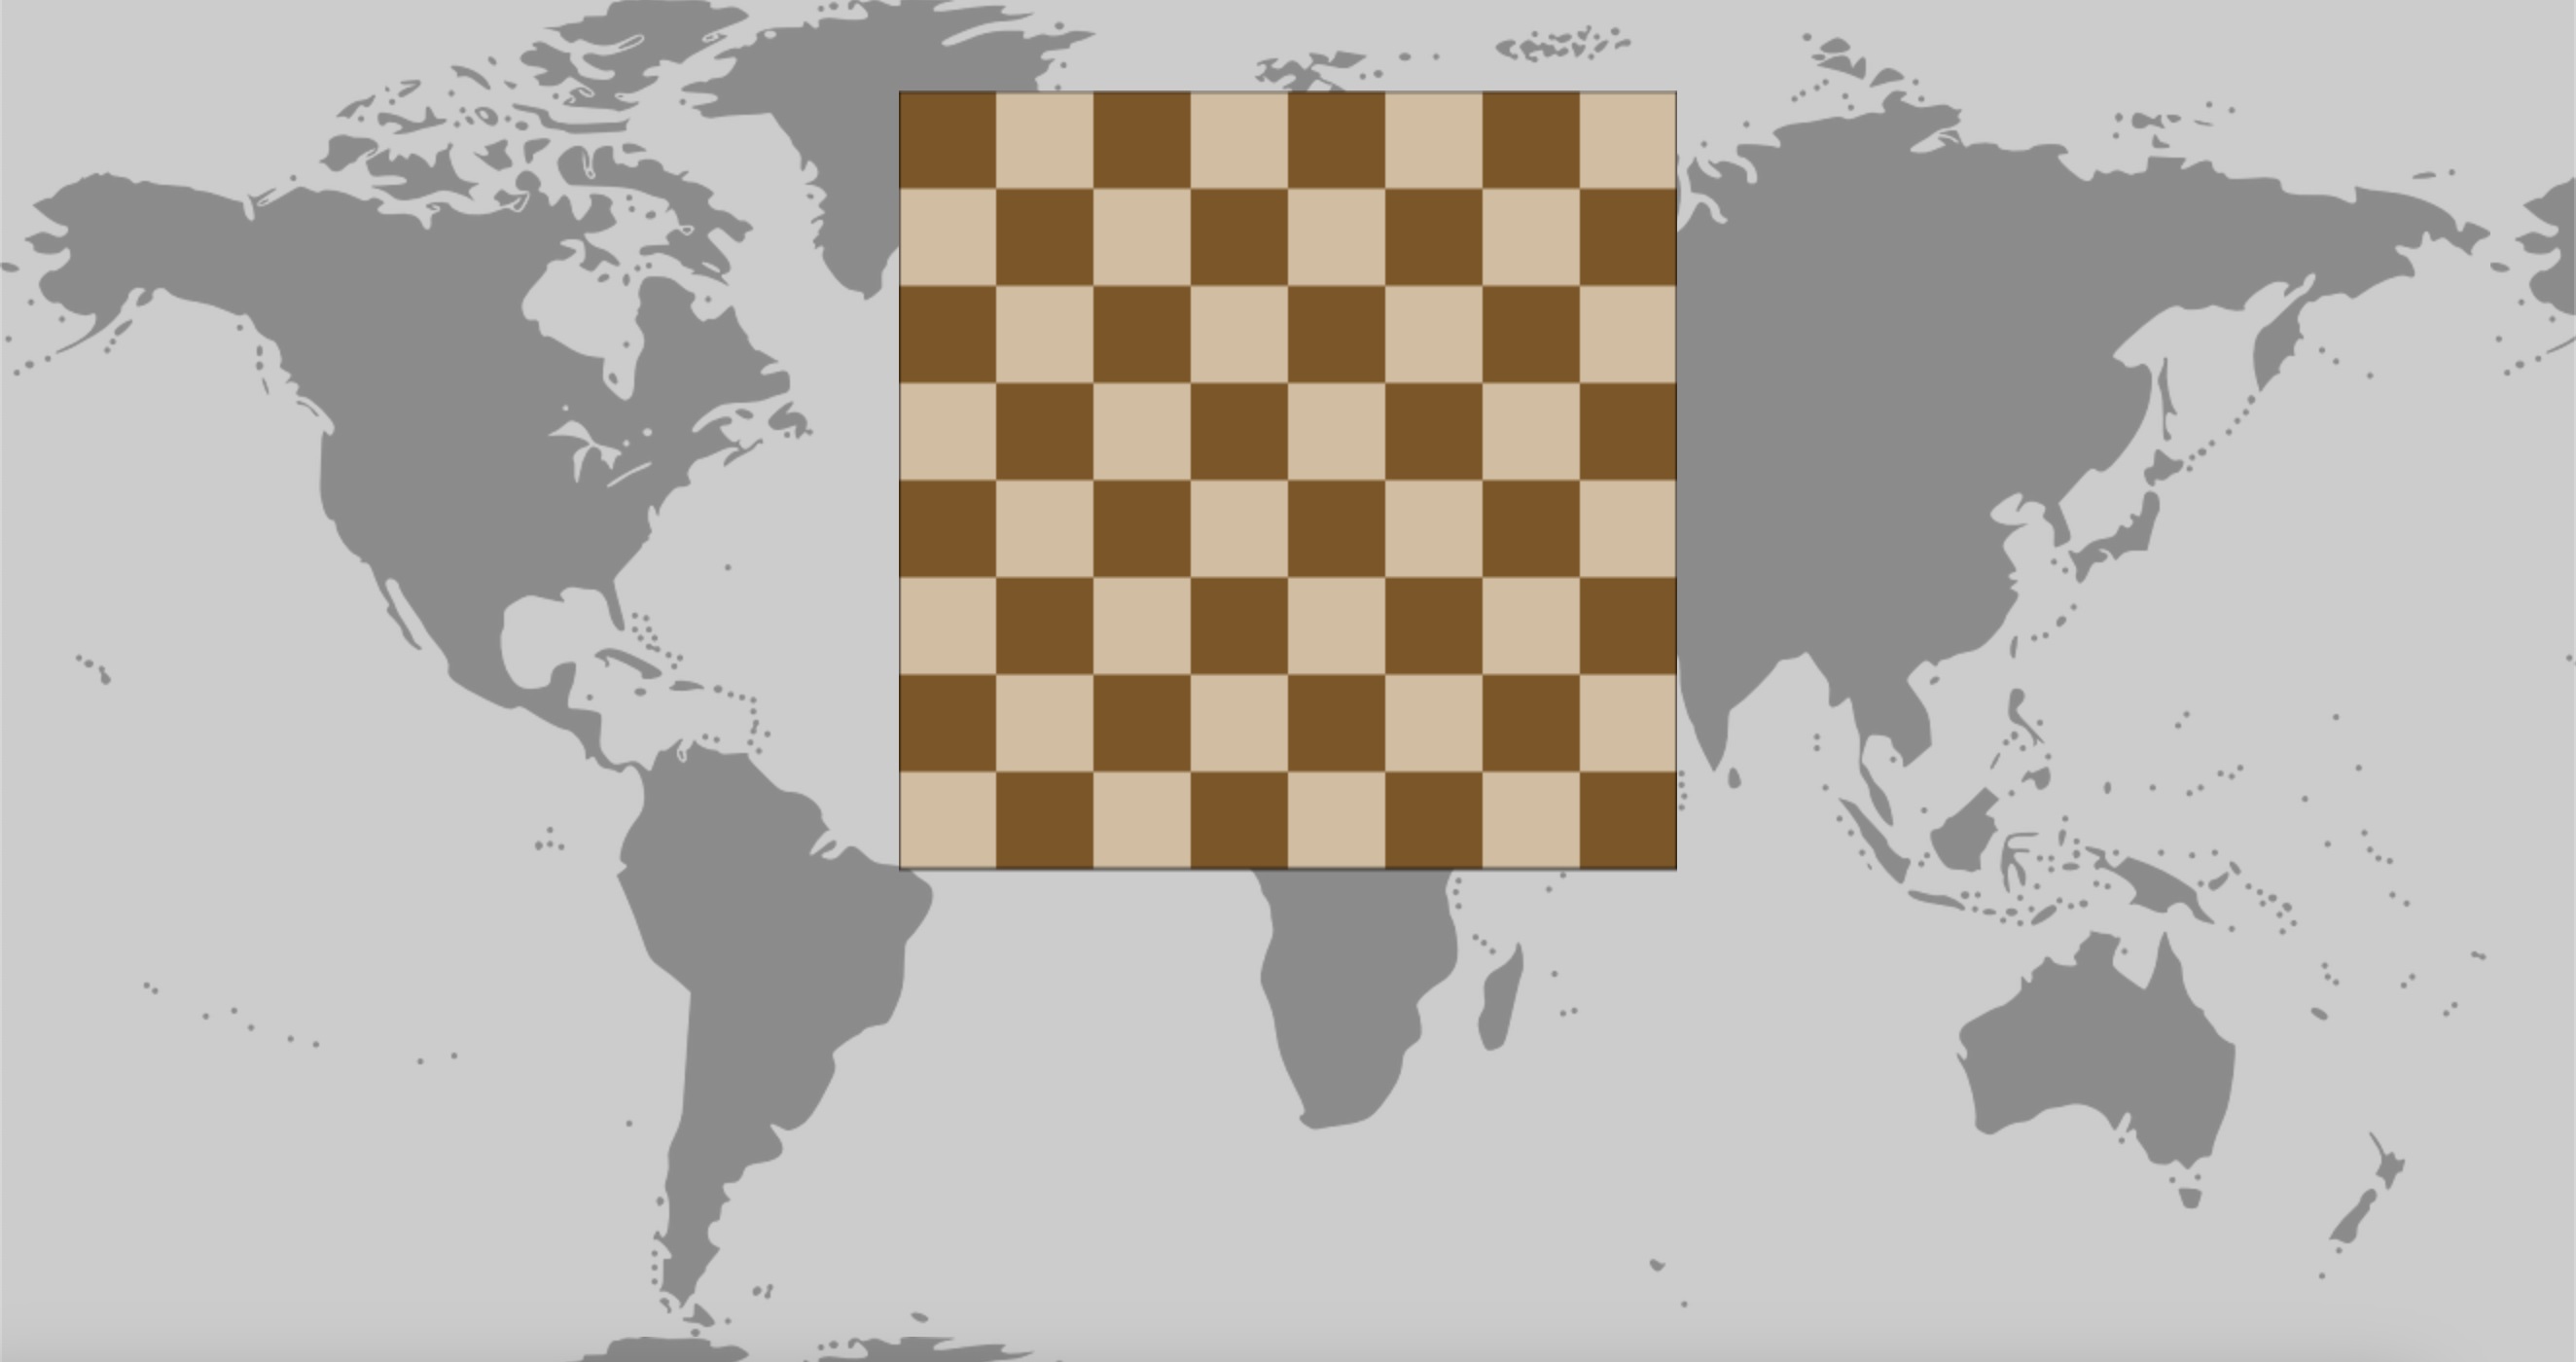
Notice the two functions ROW(x) and COL(x). These functions convert the one-dimensional array into a two-dimensional array. Why? Simply because the board from the Adama backend is interpreted as a one-dimensional array. All the remaining functions are from the Canvas API, so no need to say more. At this stage, we already have a chessboard like in the following screenshot.
But where are all the pieces? Let’s start by adding some variables and functions to render pieces on the board. However, for that, we need to pull the board state from the Adama backend, and we can leverage the Adama JavaScript API to do it.”
const PIECE_PAWN = 1,
PIECE_ROOK = 2,
PIECE_KNIGHT = 3,
PIECE_BISHOP = 4,
PIECE_QUEEN = 5,
PIECE_KING = 6,
BLACK_TEAM = "Black",
WHITE_TEAM = "White";
let pieces = null,
whitePieces = [],
blackPieces = [],
currentTurn = WHITE_TEAM,
selectedPiece = null,
player_X,
player_O,
currentPlayer,
winner,
white_win = 0,
black_win = 0;
if (canvas.getContext) {
...
pieces = new Image();
pieces.src = 'pieces.png';
} else {
...
randomRoom = function () {
return 'xxxxxxxx'.replace(/[xy]/g, function (c) {
let r = Math.random() * 16 | 0, v = c == 'x' ? r : (r & 0x3 | 0x8);
return v.toString(16);
});
}
const urlParams = new URLSearchParams(window.location.search);
const SPACE = 'chess-simple',
KEY = (urlParams.get('room') === null) ? randomRoom() : urlParams.get('room'),
IDENTITY_1 = 'anonymous:PlayerOne',
IDENTITY_2 = 'anonymous:PlayerTwo';
let connection = new Adama.Connection(Adama.Production);
connection.start();
document.getElementById('status').innerHTML = 'Connecting to production...';
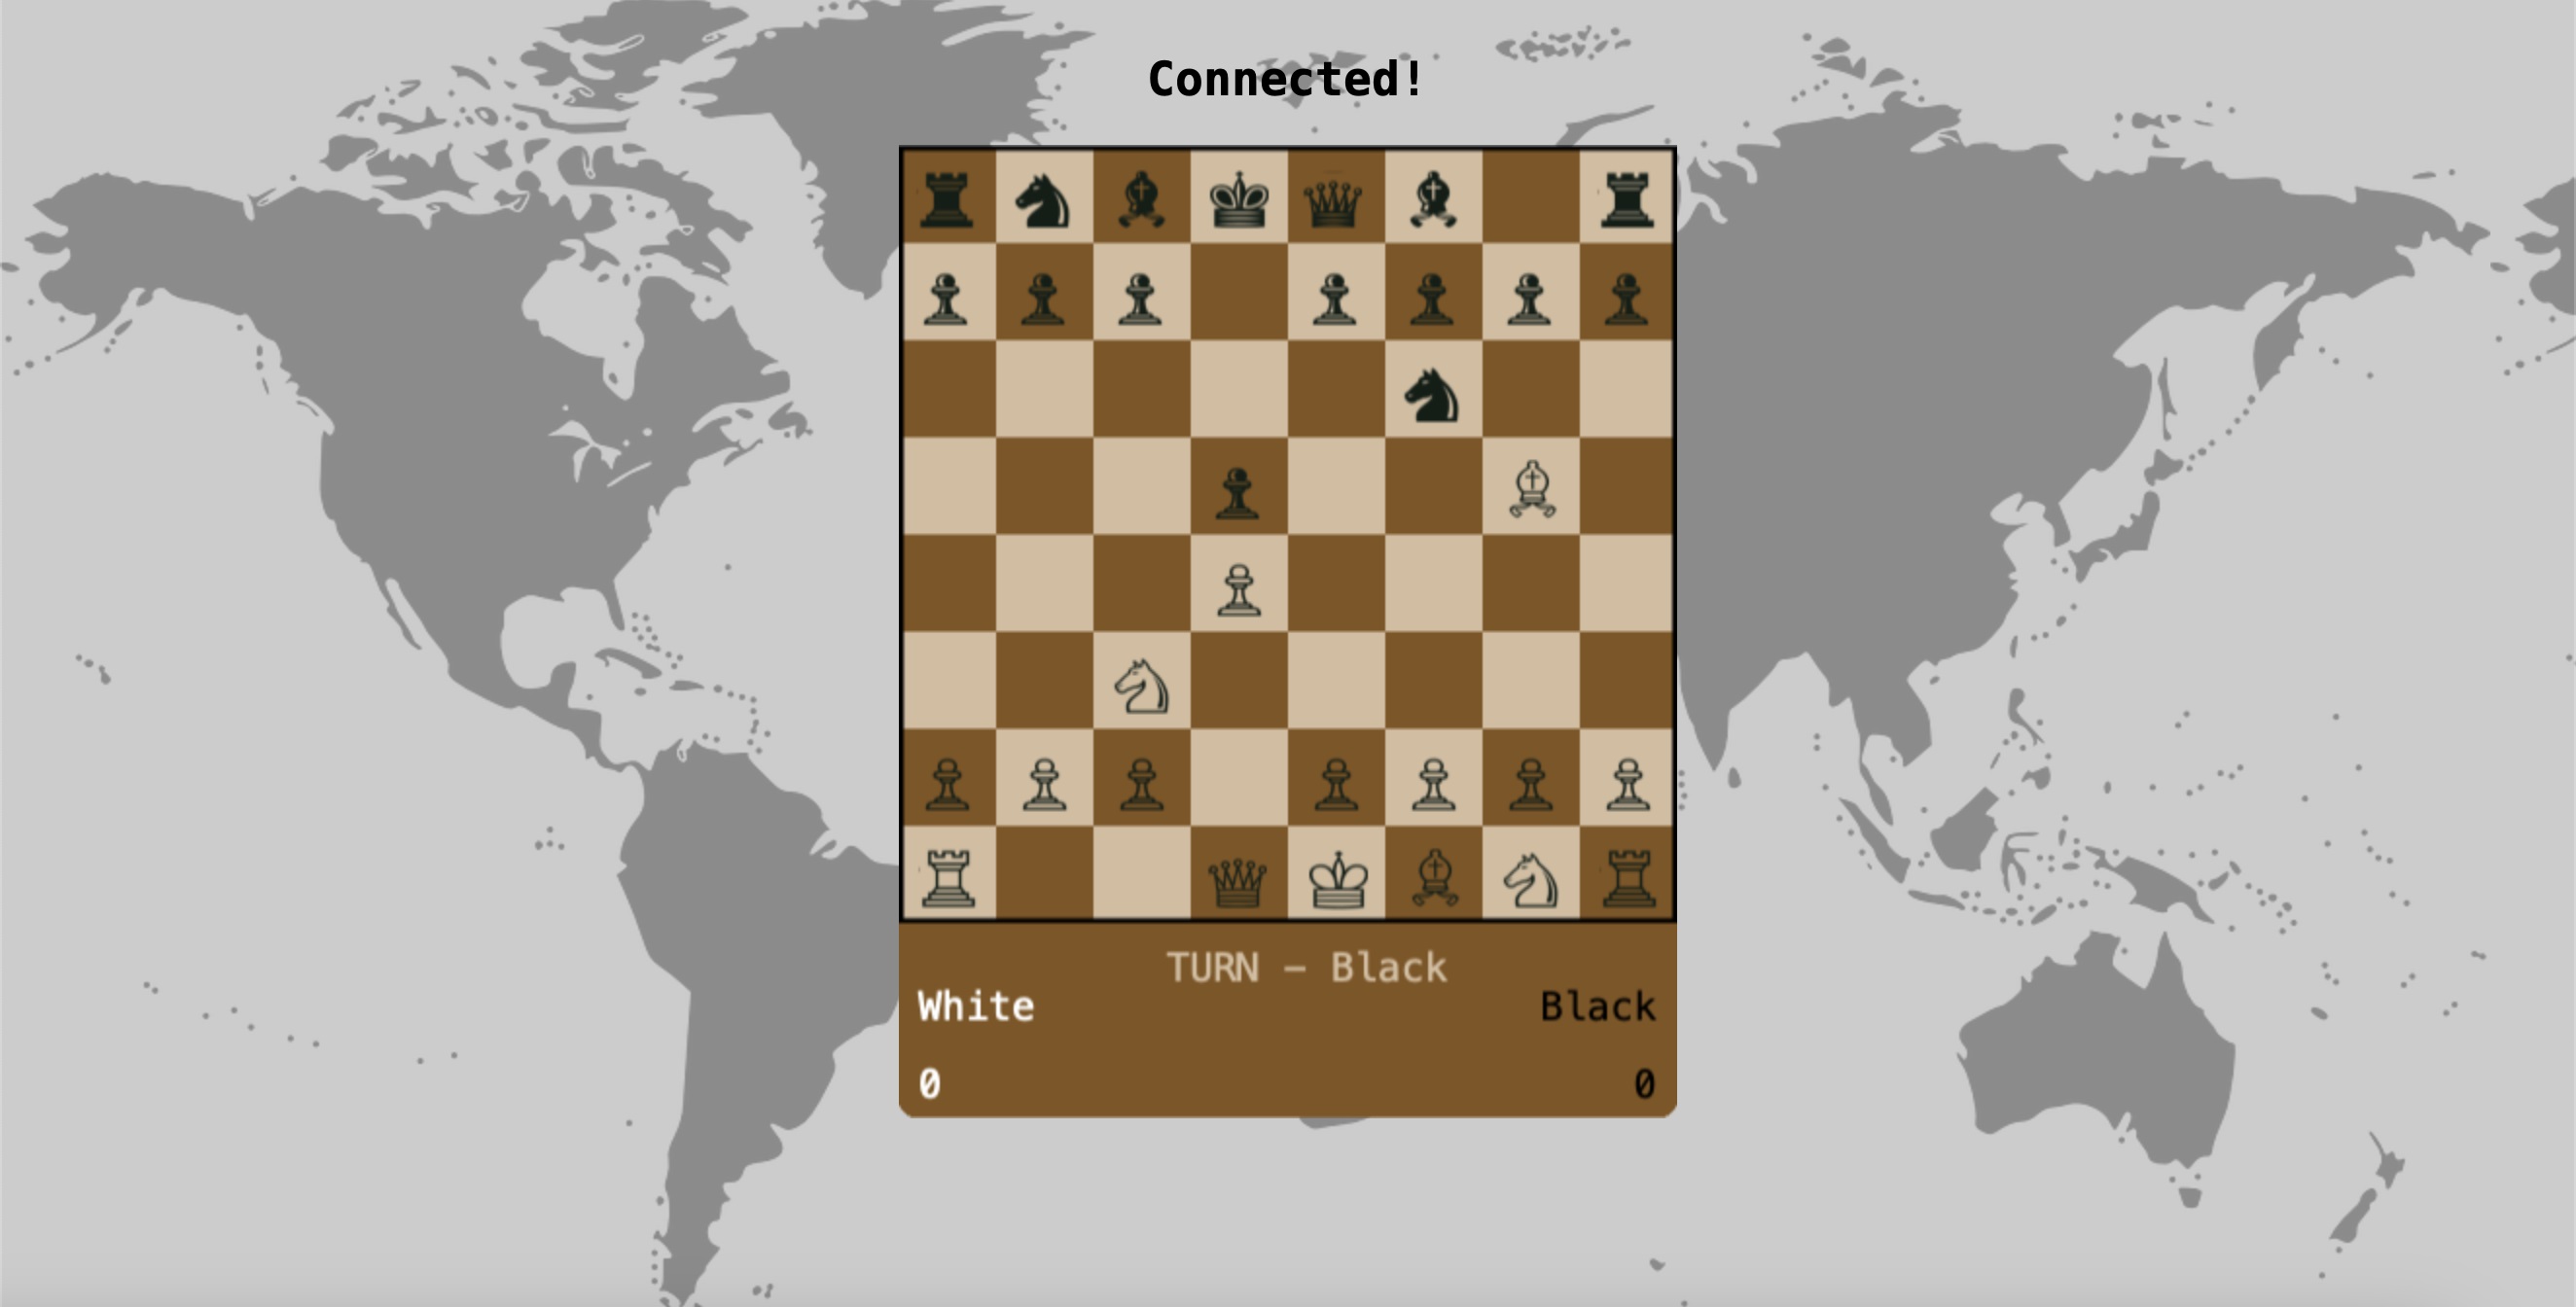
connection.wait_connected().then(function () {
document.getElementById('status').innerHTML = 'Connected!';
});
let connection1 = connection.ConnectionCreate(
IDENTITY_1,
SPACE,
KEY,
{},
moveCallback("PlayerOne")
);
let connection2 = connection.ConnectionCreate(
IDENTITY_2,
SPACE,
KEY,
{},
moveCallback("PlayerTwo")
);
function translateBoard(board) {
whitePieces = [];
blackPieces = [];
board.forEach(b => {
b.state = (b.state < 0) ? b.state * (-1) : b.state;
if (b.state >= 1 && b.state <= 6) {
whitePieces.push({
piece: b.state,
row: ROW(b.index),
col: COL(b.index),
});
} else if (b.state >= 7 && b.state <= 12) {
blackPieces.push({
piece: b.state,
row: ROW(b.index),
col: COL(b.index),
});
}
});
}
function moveCallback(playerId) {
let tree = new AdamaTree();
tree.subscribe({
board: function (board) {
if (currentPlayer === playerId) {
translateBoard(board);
}
},
playerX: function (x) {
player_X = x.agent;
},
playerO: function (o) {
player_O = o.agent;
},
current: function (c) {
currentPlayer = c.agent;
},
winner: function (w) {
winner = w.agent;
}
});
return {
next: function (payload) {
if ('delta' in payload) {
let delta = payload.delta;
if ('data' in delta) {
tree.update(delta.data);
if (typeof delta.data.board !== 'undefined') {
drawBoard();
drawTeamOfPieces(whitePieces);
drawTeamOfPieces(blackPieces);
}
}
}
},
complete: function () {
console.log('Complete');
},
failure: function (reason) {
console.error('Failed: ' + reason);
},
}
}
function drawTeamOfPieces(teamOfPieces) {
for (let i = 0; i < teamOfPieces.length; i++) {
drawPiece(teamOfPieces[i]);
}
}
function drawPiece(curPiece) {
let imageCoords = {
x: (curPiece.piece - 1) * BLOCK_SIZE,
y: 0,
};
ctx.drawImage(pieces,
imageCoords.x, imageCoords.y,
BLOCK_SIZE, BLOCK_SIZE,
curPiece.col * BLOCK_SIZE, curPiece.row * BLOCK_SIZE,
BLOCK_SIZE, BLOCK_SIZE);
}
It’s a bit long script. Some parts of this script may be familiar to you if you have already read the Javascript API section of the Adama book
The randomRoom function generates a random string that is used to identify a game room if no user-defined ID is given in the URL parameter. The connectionCreate function uses the room ID as a key parameter. The moveCallback callback function in the connectionCreate fetches updated data from the backend, puts the board state into the blackPieces and whitePieces arrays using the translateBoard function, clears and redraws the canvas with the drawBoard function, and renders pieces at their positions with the drawTeamOfPieces function. This way, the game state is only updated on the backend, while the frontend is responsible for rendering the game and capturing user inputs. To gather user input, we need to complete our script with the following:
		if (canvas.getContext) {
			...
			canvas.addEventListener('click', board_click, false);
		}  else {
		...

		function selectPiece(pieceAtBlock) {
			ctx.lineWidth = SELECT_LINE_WIDTH;
			ctx.strokeStyle = HIGHLIGHT_COLOUR;
			ctx.strokeRect(
				pieceAtBlock.col * BLOCK_SIZE + SELECT_LINE_WIDTH,
				pieceAtBlock.row * BLOCK_SIZE + SELECT_LINE_WIDTH,
				BLOCK_SIZE - SELECT_LINE_WIDTH * 2,
				BLOCK_SIZE - SELECT_LINE_WIDTH * 2,
			);

			selectedPiece = pieceAtBlock;
		}

		function sendMoveToAdama(clickedBlock) {
			if (currentPlayer === "PlayerOne")
				connection1.send(
					'play',
					{
						file_from: selectedPiece.col,
						rank_from: selectedPiece.row,
						file_to: clickedBlock.col,
						rank_to: clickedBlock.row,
					},
					{
						success: function () {
							return true;
						},
						failure: function (reason) {
							console.log('error:' + reason);
							return false;
						}
					}
				);
			else
				connection2.send(
					'play',
					{
						file_from: selectedPiece.col,
						rank_from: selectedPiece.row,
						file_to: clickedBlock.col,
						rank_to: clickedBlock.row,
					},
					{
						success: function () {
							return true;
						},
						failure: function (reason) {
							console.log('error' + reason);
							return false;
						}
					}
				);
		}

		function getBlockColour(rowCounter, blockCounter) {
			let cStartColour;
			if (rowCounter % 2) {
				cStartColour = (blockCounter % 2 ? BLOCK_COLOUR_1 : BLOCK_COLOUR_2);
			} else {
				cStartColour = (blockCounter % 2 ? BLOCK_COLOUR_2 : BLOCK_COLOUR_1);
			}
			return cStartColour;
		}

		function removeSelection(selectedPiece) {
			ctx.fillStyle = getBlockColour(selectedPiece.col, selectedPiece.row);
			ctx.fillRect(selectedPiece.col * BLOCK_SIZE, selectedPiece.row * BLOCK_SIZE,
				BLOCK_SIZE, BLOCK_SIZE);
			ctx.stroke();
			drawPiece(selectedPiece);
		}

		function getPieceAtBlockForTeam(teamOfPieces, clickedBlock) {
			let curPiece = null,
				pieceAtBlock = null;

			for (let i = 0; i < teamOfPieces.length; i++) {
				curPiece = teamOfPieces[i];

				if (
					curPiece.col === clickedBlock.col &&
					curPiece.row === clickedBlock.row
				) {
					curPiece.position = i;
					pieceAtBlock = curPiece;
					i = teamOfPieces.length;
				}
			}

			return pieceAtBlock;
		}

		function getPieceAtBlock(clickedBlock) {
			let team = currentTurn === BLACK_TEAM ? blackPieces : whitePieces;
			return getPieceAtBlockForTeam(team, clickedBlock);
		}

		function checkIfPieceClicked(clickedBlock) {
			let pieceAtBlock = getPieceAtBlock(clickedBlock);
			if (pieceAtBlock !== null) {
				selectPiece(pieceAtBlock);
			}
		}

		function screenToBlock(x, y) {
			let block = {
				row: Math.floor(y / BLOCK_SIZE),
				col: Math.floor(x / BLOCK_SIZE),
			};

			return block;
		}

		function board_click(ev) {
			let x = ev.clientX - canvas.offsetLeft,
				y = ev.clientY - canvas.offsetTop,
				clickedBlock = screenToBlock(x, y);
			if (selectedPiece === null) {
				checkIfPieceClicked(clickedBlock);
			} else {
				if (getPieceAtBlock(clickedBlock)) {
					removeSelection(selectedPiece);
					checkIfPieceClicked(clickedBlock);
				} else {
					sendMoveToAdama(clickedBlock);
				}
			}
		}
The sendMoveToAdama function utilizes the previously established connection to send the move data, gathered by the board_click function, to the backend. The move data includes selectedPiece and clickedBlock, which represent the position of the piece to be moved and the destination position chosen by the user, respectively. These positions are sent to the backend for validation.
Now, let’s delve into the Adama code and explore its various components.
The game state machine with Adama
The Adama code starts with policy declarations enclosed within the @static block. In this case, the declarations include two functions, create and invent, which both return true. This simplifies the policy declarations.
Next, several integer constants are defined to represent the different chess pieces. For example, WHITE_PAWN is assigned the value 1, WHITE_ROOK is assigned 2, and so on. These constants are used to identify the state of each square on the chessboard.
The principal variables playerX and playerO represent the two players in the game, and current represents the current player making a move. The winner variable is used to store the principal who wins the game.
A record called Square is defined with two fields: index and state. This record represents the data of each square on the chessboard, where index is the position of the square and state represents the piece occupying the square. These square records are stored in a table called _squares.
At this stage, the code includes all the required parts.
@static {
    create {
      return true;
    }
    invent {
      return true;
    }
}

public int WHITE_PAWN = 1;
public int WHITE_ROOK = 2;
public int WHITE_KNIGHT = 3;
public int WHITE_BISHOP = 4;
public int WHITE_QUEEN = 5;
public int WHITE_KING = 6;

public int BLACK_PAWN = 7;
public int BLACK_ROOK = 8;
public int BLACK_KNIGHT = 9;
public int BLACK_BISHOP = 10;
public int BLACK_QUEEN = 11;
public int BLACK_KING = 12;

public int EMPTY = 13;

public principal playerX;
public principal playerO;
public principal current;
public principal winner;

record Square {
  public int index;
  public int state;
}

table<Square> _squares;

@construct {}

@connected {}
When our chess game backend starts, it initializes the chessboard by populating the _squares table with the starting positions of the chess pieces. We do it by adding this part into the previous code:
...
table<Square> _squares;

procedure initBoard() {
  	_squares <- { index: 0, state: BLACK_ROOK };
	_squares <- { index: 1, state: BLACK_KNIGHT };
	_squares <- { index: 2, state: BLACK_BISHOP };
	_squares <- { index: 3, state: BLACK_KING };
	_squares <- { index: 4, state: BLACK_QUEEN };
	_squares <- { index: 5, state: BLACK_BISHOP };
	_squares <- { index: 6, state: BLACK_KNIGHT };
	_squares <- { index: 7, state: BLACK_ROOK };
	for (int i = 8; i < 16; i++) {
		_squares <- { index: i, state: BLACK_PAWN };
	}
	for (int i = 16; i < 48; i++) {
		_squares <- { index: i, state: EMPTY };
	}
	for (int i = 48; i < 56; i++) {
		_squares <- { index: i, state: WHITE_PAWN };
	}
	_squares <- { index: 56, state: WHITE_ROOK };
	_squares <- { index: 57, state: WHITE_KNIGHT };
	_squares <- { index: 58, state: WHITE_BISHOP };
	_squares <- { index: 59, state: WHITE_QUEEN };
	_squares <- { index: 60, state: WHITE_KING };
	_squares <- { index: 61, state: WHITE_BISHOP };
	_squares <- { index: 62, state: WHITE_KNIGHT };
	_squares <- { index: 63, state: WHITE_ROOK };
}
Then, call this procedure inside the @construct block:
@construct {
  	initBoard();
}
To manage the player state at the initialization of the game, let’s write this logic inside the @connected block. It means that this logic is only triggered when users are connected:
@connected {
	if (playerX == @no_one) {
		playerX = @who;
		if (playerO != @no_one) {
			transition #initiate;
		}
	} else if (playerO == @no_one) {
		playerO = @who;
		if (playerX != @no_one) {
			transition #initiate;
		}
	}
	return true;
}
When everything is ready, we need to tell our chess backend what to do.
#initiate {
	winner = @no_one;
	current = playerX;
	transition #turn;
}
Notice the keyword #turn. It indicates the code block where we handle the game state. This block fetches the message Play sent by the frontend on the channel channel<Play> play. It indicates all legal moves of the piece on the board, validates the move requested by the frontend, verifies if a checkmate occurs, and switches the turn. The code block looks like the following:
	message Play {
		int file_from;
		int rank_from;
		int file_to;
		int rank_to;
	}
	channel<Play> play;

	future<Play> move_pick = play.fetch(current);
	let file_from = move_pick.await().file_from;
	let rank_from = move_pick.await().rank_from;
	let file_to = move_pick.await().file_to;
	let rank_to = move_pick.await().rank_to;

  	if ((iterate _squares where index == rank_from * 8 + file_from)[0] as square_from) {
		let valid = validateMoveForPiece(file_from, rank_from, square_from.state);
		if (valid) {
			performMove(file_from, rank_from, file_to, rank_to);
			current = playerX == current ? playerO : playerX;

			list<Square> bking = (iterate _squares where state == BLACK_KING);
			list<Square> wking = (iterate _squares where state == WHITE_KING);

			if (wking.size() != 0 && bking.size() == 0) {
				winner = playerX;
				transition #end;
			} else if (bking.size() != 0 && wking.size() == 0) {
				winner = playerO;
				transition #end;
			} else {
				transition #turn;
			}
		} else {
			transition #turn;
		}
	}
In any Adama code, when you need to get or set an element of a table at a given index, you can use this technique:
if ((iterate _squares where index == your_index)[0] as square) {
	square.state = ...
}
And this kind of operation, rank_from * 8 + file_from, is used to transform two-dimensional coordinates into one dimension. It is often easier, if not the only way, to manage one-dimensional data with a table.
We need to define two procedures here: performMove and validateMoveForPiece. As the name suggests, performMove alters the table _squares with the validated move obtained from the message, and it also handles pawn promotion if applicable.
procedure performMove(int col_from, int row_from, int col_to, int row_to) {
	if(current == playerX) {
		if ((iterate _squares where index == (row_to * 8 + col_to))[0] as sq_row_col) {
			if (sq_row_col.state < 0) { // Check if the destination is a legal move
				if ((iterate _squares where index == (row_from * 8 + col_from))[0] as _sq_row_col_from) {
					sq_row_col.state = (row_to == 0 && _sq_row_col_from.state == WHITE_PAWN) ? WHITE_QUEEN : _sq_row_col_from.state; // Promote or move
					_sq_row_col_from.state = EMPTY;
				}
			}
			// Reset board: clear the legal move marks
			for(int l = 0; l < 8; l++) {
				for(int c = 0; c < 8; c++) {
					if ((iterate _squares where index == (l * 8 + c))[0] as sq_l_c) {
						if(sq_l_c.state < 0) {
							sq_l_c.state *= -1;
						}
					}
				}
			}
		}
  	} else if (current == playerO) {
		if ((iterate _squares where index == (row_to * 8 + col_to))[0] as sq_row_col) {
			if (sq_row_col.state < 0) { // Check if the destination is a legal move
				if ((iterate _squares where index == (row_from * 8 + col_from))[0] as _sq_row_col_from) {
					sq_row_col.state = (row_to == 7 && _sq_row_col_from.state == BLACK_PAWN) ? BLACK_QUEEN : _sq_row_col_from.state; // Promote or move
					_sq_row_col_from.state = EMPTY;
				}
      		}
			// Reset board: clear the legal move marks
			for(int l = 0; l < 8; l++) {
          		for(int c = 0; c < 8; c++) {
					if ((iterate _squares where index == (l * 8 + c))[0] as sq_l_c) {
						if(sq_l_c.state < 0) {
							sq_l_c.state *= -1;
						}
					}
				}
        	}
    	}
  	}
}
Inside the validateMoveForPiece procedure, we verify all the legal moves of a piece at the given position. This procedure returns a boolean value of true if one or more legal moves are discovered. These legal moves are marked by the negative value of the state of the square at their position. That’s why we need to reset the board before each move validation.
Here’s how it can be done:
procedure validateMoveForPiece(int col_from, int row_from, int pieceInPos) -> bool {
	int c;
	int l;

	// Reset board: clear the legal move marks
	for(l = 0; l < 8; l++) {
		for(c = 0; c < 8; c++) {
			if((iterate _squares where index == (l * 8 + c))[0] as sq_l_c) {
				if (sq_l_c.state < 0) {
					sq_l_c.state *= -1;
				}
			}
		}
	}

	if (pieceInPos == WHITE_KNIGHT) {
		setKnightMoves(col_from, row_from);
	} else if (pieceInPos == WHITE_ROOK) {
		setRookMoves(col_from, row_from);
	} else if (pieceInPos == WHITE_BISHOP) {
		setBishopMoves(col_from, row_from);
	} else if (pieceInPos == WHITE_QUEEN) {
		setQueenMoves(col_from, row_from);
	} else if (pieceInPos == WHITE_KING) {
		setKingMoves(col_from, row_from);
	} else if (pieceInPos == WHITE_PAWN) {
		setPawnMoves(col_from, row_from);
		// ================================
	} else if (pieceInPos == BLACK_KNIGHT) {
		setKnightMoves(col_from, row_from);
	} else if (pieceInPos == BLACK_ROOK) {
		setRookMoves(col_from, row_from);
	} else if (pieceInPos == BLACK_BISHOP) {
		setBishopMoves(col_from, row_from);
	} else if (pieceInPos == BLACK_QUEEN) {
		setQueenMoves(col_from, row_from);
	} else if (pieceInPos == BLACK_KING) {
		setKingMoves(col_from, row_from);
	} else if (pieceInPos == BLACK_PAWN) {
		setPawnMoves(col_from, row_from);
	}

	// TEST IF THERE IS AT LEAST ONE VALID MOVE
	for(l = 0; l < 8; l++) {
		for(c = 0; c < 8; c++) {
		if((iterate _squares where index == (l * 8 + c))[0] as sq_l_c) {
			if (sq_l_c.state < 0) {
				return true;
				}
			}
		}
	}
	return false;
}
Procedures such as setRookMoves, setKnightMoves, setBishopMoves, setQueenMoves, setKingMoves, and setPawnMoves are used to set the possible moves for each type of chess piece based on their movement rules. These procedures invoke the markPossibleMoves procedure accordingly. The markPossibleMoves procedure is responsible for marking the legal moves for a given square based on the current player’s turn and the piece occupying that square. It checks if the destination position falls within the boundaries of the board and then verifies the moves based on the player and piece type.
Let’s take a look at one of these procedures. If you wish to review all of them, I invite you to refer to the complete source code provided with this article. You will also come across some utility procedures, which I hope will be self-explanatory.
procedure markPossibleMoves(int col, int row) -> int {
	if (col >= 0 && col < 8 && row >= 0 && row < 8) {
		if (current == playerX) {
			if((iterate _squares where index == (row * 8 + col))[0] as sq_row_col) {
				if (sq_row_col.state >= BLACK_PAWN && sq_row_col.state <= BLACK_KING) {
					sq_row_col.state *= -1;
					return 1;
				} else if (sq_row_col.state == EMPTY) {
					sq_row_col.state *= -1;
					return 0;
				}
			}
		} else if (current == playerO) {
			if((iterate _squares where index == (row * 8 + col))[0] as sq_row_col) {
				if (sq_row_col.state >= WHITE_PAWN && sq_row_col.state <= WHITE_KING) {
					sq_row_col.state *= -1;
					return 1;
				} else if (sq_row_col.state == EMPTY) {
					sq_row_col.state *= -1;
					return 0;
				}
			}
		}
	}
	return 1;
}

procedure setRookMoves(int col_from, int row_from) {
	int row;
	int col;
	int test;
	// UP
	row = row_from - 1;
	test = 0;
	while(row >= 0 && test == 0) {
		test = markPossibleMoves(col_from, row);
		row--;
	}

	// DOWN
	row = row_from + 1;
	test = 0;
	while(row < 8 && test == 0) {
		test = markPossibleMoves(col_from, row);
		row++;
	}

	// LEFT
	col = col_from - 1;
	test = 0;
	while(col >= 0 && test == 0) {
		test = markPossibleMoves(col, row_from);
		col--;
	}

	// RIGHT
	col = col_from + 1;
	test = 0;
	while(col < 8 && test == 0) {
		test = markPossibleMoves(col, row_from);
		col++;
	}
}
The deployment of these codes can be done as follows:
java -jar adama.jar space deploy --space <your-space> --file chess.adama
For hosting the frontend part, you have the option to use a static web server or host it on AWS S3. Additionally, you can gather some deployment ideas from the deployment of the Reddit clone.
And now, the best part of all this hard work…
Conclusion
Congratulations! You have successfully built a simple online chess game using Adama and Javascript. Throughout this project, we covered various aspects including project structuring, chessboard display and interactivity, game state management, and move validation implementation. However, it’s important to note that the current state of the game is basic and does not yet handle rules such as “castling” and “en passant”. To enhance the game further, you can consider implementing these rules and making overall improvements. Keep exploring, and happy coding!